Got a Pokémon superfan in your life? Someone whose love for those pocket monsters knows no bounds, whether they’re a kid or a kid-at-heart adult?
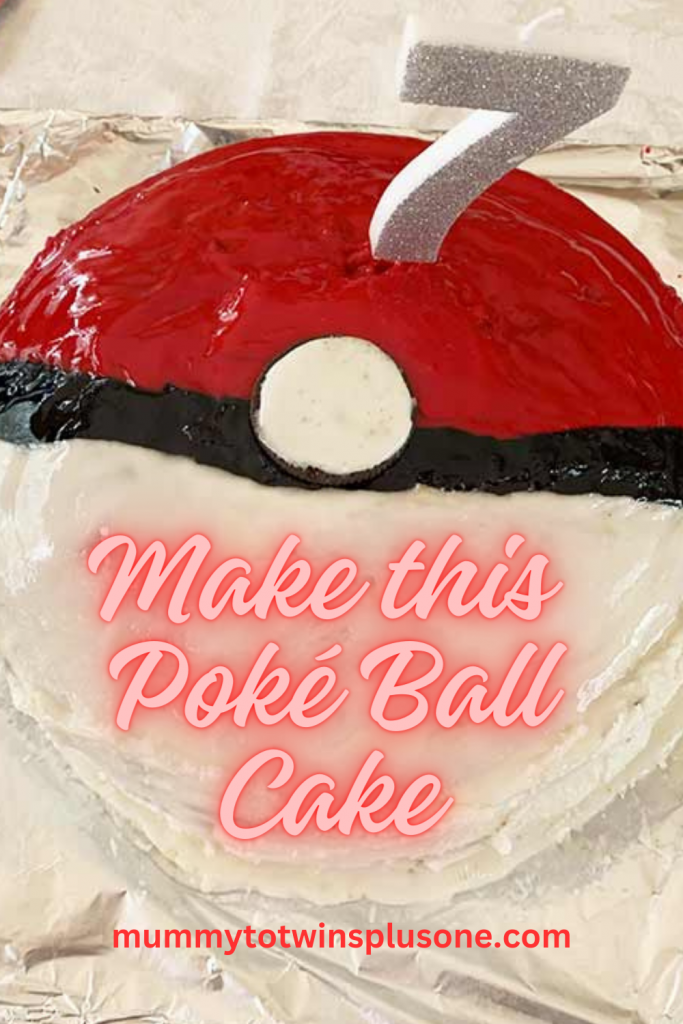
Imagine their eyes lighting up like a Pikachu’s cheeks when they lay eyes on a Poké Ball cake! 🎂🌟 Have you ever thought about surprising them with this epic creation for their upcoming birthday bash? Trust me, it’s bound to be a hit among Pokémon trainers of all ages!
ϞϞ૮(๑⚈ ․̫ ⚈๑)ა
Oh, let me tell you about my energetic Pokémon enthusiast! My little guy adores everything about Pokémon, especially collecting those coveted cards. So, when his birthday rolled around, there was no surprise when he demanded a Pokémon-themed cake.
Now, I pondered for a moment, scratching my head (figuratively, of course!), and then it hit me like a Pikachu’s Thunderbolt – a Poké Ball cake!
It seemed like the perfect solution to grant my kiddo’s birthday wish, and hey, who doesn’t love a challenge that involves edible artistry? Keen to see the finished cake, scroll down to the bottom of this post or watch the Instagram Reel on this post to get an idea of how it was created.
Ϟ(๑⚈ ․̫ ⚈๑)⋆
ϞϞ(๑⚈ ․̫ ⚈๑)∩
Ingredients
- 2 vanilla cake mixes (I made it easy for myself and used vanilla cake mixes – if you want to make your own from scratch that is fine too. You can create a chocolate cake if you would rather. Mine was vanilla due to the birthday boy not liking chocolate).
- 4 eggs (2 for each cake mix)
- Oreo Cookie (for the middle of the Poké Ball)
- Milk
- Butter/oil (I find that oil mixes better, I used vegetable oil but you can use olive oil)
- Lemon juice from 1 lemon and zest from the lemon
- 1 Egg white from a very large egg – for the white icing
- 2 cups of icing sugar
- Half a teaspoon of water (for the icing)
- Red and Black gel colouring for the icing (this makes more vivid and stronger colours)
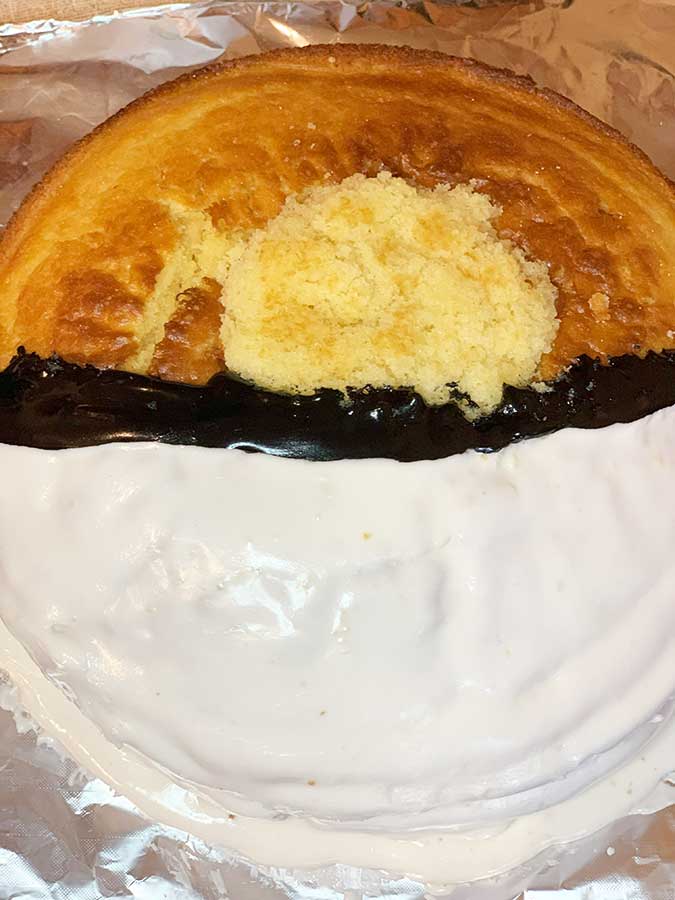
- Lollies for the centre of the cake (I used snakes and other gummies, you can have M&M’s if you wish or say skittles – the bright colours would look amazing).
NOTE: The centre of the cake was cut out to add lollies to the middle of it. Looks a bit worse here but will soon be covered over with icing and also an Oreo Cookie.
Ϟ(๑• .̫ •๑)∩
Pre-heat oven to 180°C or 356°F
Method
Making the cakes
1. Grease 2 round cake pans
2. Mix the cake mix and follow the instructions on the packet. My only changes are that I add oil instead of butter as well as fresh lemon juice and rind from a fresh lemon.
3. Cook for around 30 minutes or until the cake is golden and when you put in a knife it is all cooked through.
4. Allow cakes to cool a little before getting them out of the tins
Making the white icing/royal icing
- Add 2 cups of soft icing sugar, 1 egg white and half a teaspoon of water to a bowl. Mix well or use a beater to make it more fluffy looking.
- If you need to you can add more water
- Also for flavour you can add some vanilla essence or a little lemon juice – I decided to just leave mine plain.
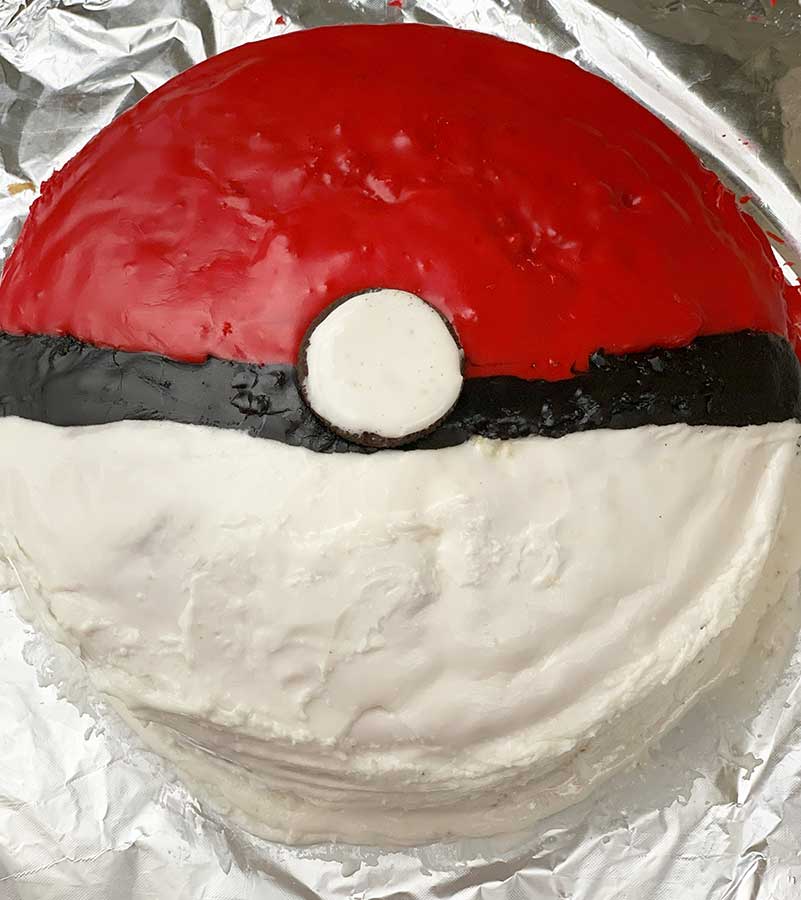
Decorating the Poké Ball cake
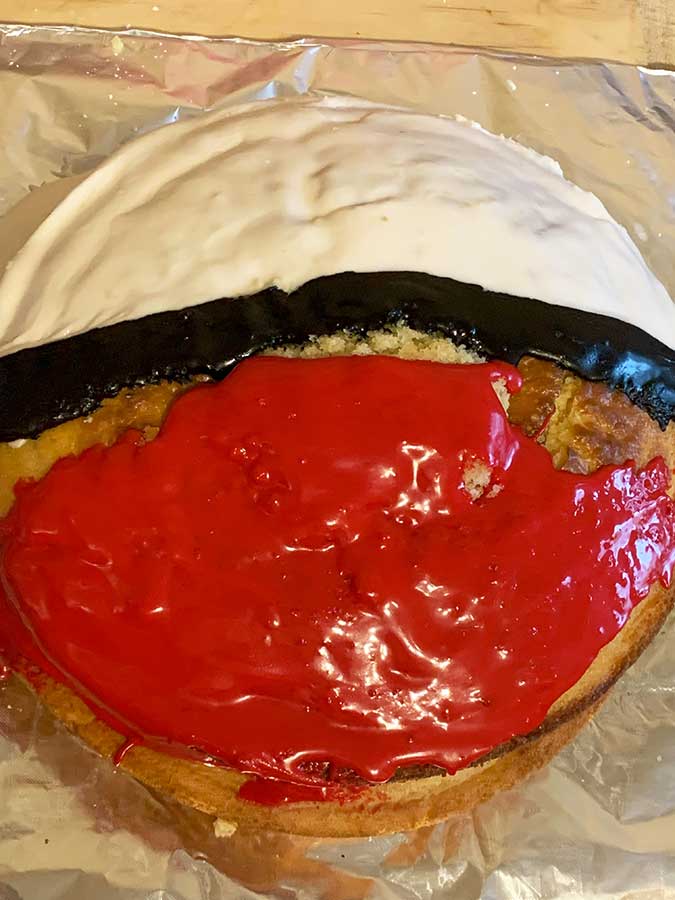
- Make the bottom of the cake white
- Make the middle a thick black line
- Make the top of the cake red
- In the middle of the black line place the Oreo Cookie with the icing side up. If the icing isn’t as you liked it you can add some white icing to the cookie to make sure that it looks correct.
If you are planning a Pokémon party you will need the below items:
- Pokémon Pokeball Edible Cake Topper – Icing Sheet – 9.5×9.5cm
- Pokémon Edible Cake Toppers – Personal the cake topper, grab a Pikachu cake topper!
- Pokémon birthday party supplies – balloons, loot bag gifts, plates and napkins and loads more!
Sign up for my newsletter
Stay current with all the things that are happening on Mummy to Twins Plus One. Don’t miss a thing by signing up for my newsletter. This newsletter will list all giveaways and fabulous things that are happening.
This page contains affiliate links